
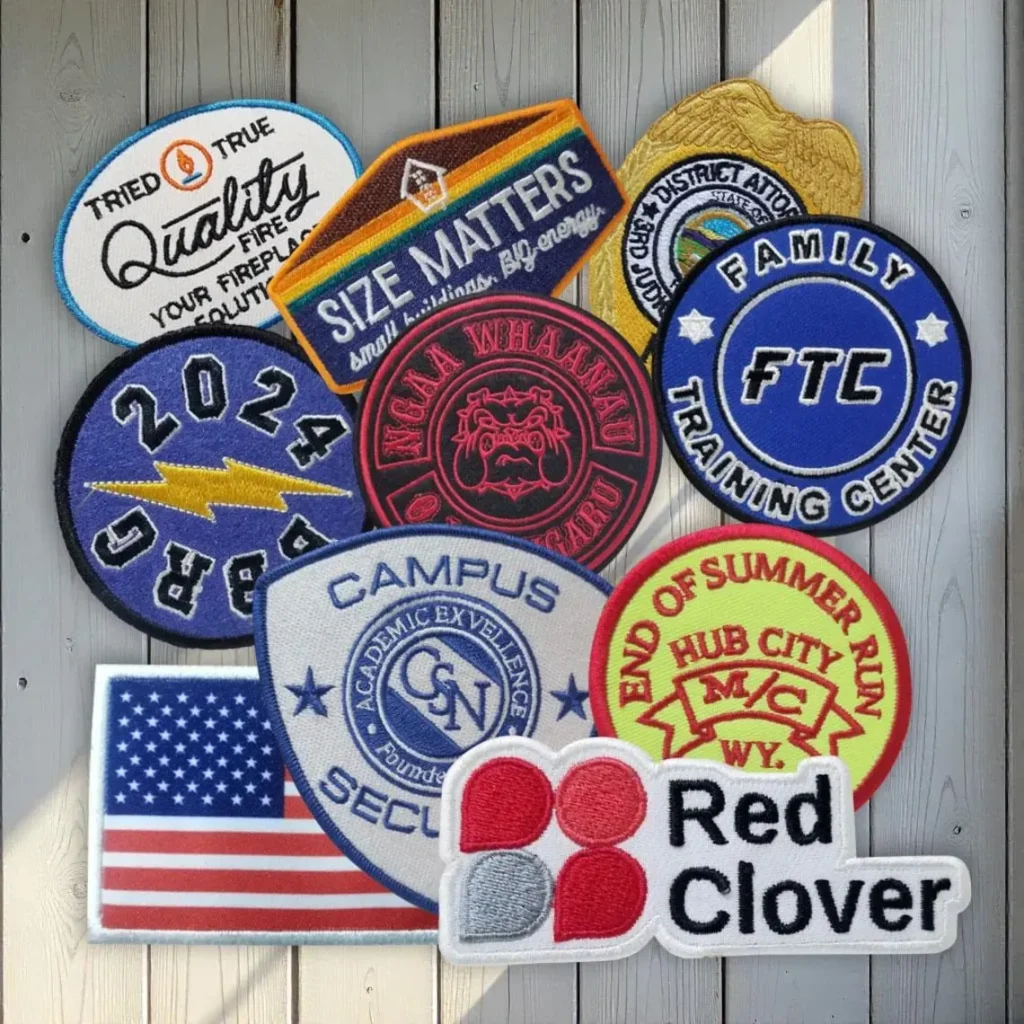
Custom Patches have evolved from niche embroidery into a powerful form of personal expression, brand identity, and community storytelling. From jackets to bags, patches offer a tangible way to showcase style and values. This introductory guide explains what patches are and how designers translate ideas into tangible badges. You will explore both DIY approaches and professional production paths to fit your budget and timeline. By the end, you will have a clear roadmap for turning ideas into durable, eye-catching patches that withstand daily wear.
Explore how these fabric badges evolve through stitching, color choices, and backings, whether you are aiming for classic embroidered patches or modern woven alternatives. Alongside the craft, branding, messaging, and wearability shape the design from concept to finished piece. From small runs to DIY kits, you can tailor the approach to your goals and budget.
What Are Custom Patches? Defining Identity and Expression
Custom patches are fabric embellishments that carry embroidery or woven designs and can be attached to jackets, bags, caps, or uniforms. When we say Custom Patches, we’re referring to a broad family that includes embroidered patches as well as woven, iron-on, sew-on, or Velcro-backed options. Their appeal lies in tactile texture, vibrant thread colors, and the ability to tell a story at a glance, making them a compact canvas for branding, affiliation, or personal expression.
Understanding their scope helps you decide where to use them and how to approach design. The patch production process begins with a clear purpose and audience—brand, team, event, or hobby—then moves through design ideas, digitizing, and finishing. Whether you’re sketching ideas for a DIY patch or planning a large run for a club, the design must stay legible at typical patch sizes and read well from a short distance.
Patch Design Ideas: How to Create Impactful Imagery
Patch design ideas set the stage for success. Start with the intended wearer and garment, then translate the concept into shapes, contrast, and color that read on fabric. For small patches, keep the artwork simple; limit the color palette to maintain contrast and control costs while ensuring the patch stays legible when stitched. Think about storytelling elements—mascots, initials, symbols, or motto words—that capture the group’s identity.
Typography, symbol layering, and finishing choices influence how your patch looks on screen and in real life. Consider Merrow borders for a traditional, durable edge or laser-cut edges for a modern silhouette. The same patch design ideas can evolve into embroidered patches or woven patches; the key is designing with stitch count, density, and edge finishing in mind so the final product reads clearly at 2–4 inches.
From Idea to Icon: The Patch Production Process
The patch production process begins after a solid concept. You validate size and shape, pick a backing, and prepare artwork as a clean vector or high-resolution raster file. Then a digitizer converts the artwork into stitch instructions, selecting stitch types (satin, fill, running) and determining density to balance coverage with fabric stability. A sample patch is produced to verify color accuracy and edge quality before mass production.
Once the sample passes, production scales up and quality control checks catch thread breaks, misalignments, or backing issues. The patch production process also considers fabric compatibility and backing performance, ensuring durability for daily wear. Whether you’re producing hundreds of patches or thousands, attention to stitch count, density, and finishing will influence price, look, and longevity.
DIY Patches vs. Professional Production: Choosing Your Path
DIY patches offer flexibility, immediate feedback, and low entry costs for small quantities. With iron-on patches, you can apply designs at home using a household iron or a heat press, and you can sew patches by hand or with a home sewing machine for a traditional finish. DIY patches are an excellent way to prototype ideas quickly, test colors, and learn the basics of patch design ideas.
Professional production shines when you need consistency, higher stitch counts, and scalable output. A reputable patch manufacturer provides reliable color matching, durable backings, and finished patches suitable for uniforms, events, or merchandise. For prototypes or limited runs, working with a professional service keeps the project efficient while delivering a cohesive look across the entire order.
Materials, Backing, and Finishing: Crafting Durable Patches
Materials, backing, and finishing determine how a patch performs in real life. A sturdy fabric base—twill or felt—supports embroidery and reduces puckering, while finishing options like Merrow borders or laser-cut edges define the final silhouette. Backings range from iron-on for easy application to sew-on for lasting attachment, with Velcro-backed options enabling interchangeable designs on apparel or bags.
Choosing the right combination of materials and finishing touches affects washability, colorfastness, and wear. Some patches use adhesive-backed stabilizers for temporary placement, while others are built for long-term wear. Understanding the patch production process helps you select options that align with your budget and timeline, ensuring your patches remain vibrant and durable over time.
Care, Longevity, and Display of Embroidered Patches
Care, display, and longevity are essential for patches to stay looking sharp. For embroidered patches, hand washing or gentle cold machine washing is often recommended, with patches turned inside out to minimize friction. If your patch has an iron-on backing, follow laundering guidelines and air-dry to reduce heat exposure that could loosen adhesive or warp shapes.
Display considerations also matter—patches can be worn as part of a uniform, showcased on a collection board, or stitched onto a favorite garment. Regularly clean Velcro hooks and loops to maintain attachment, and store patches in a cool, dry place to prevent fading. With proper care, your patches—whether DIY patches or professionally produced embroidered patches—will remain eye-catching and durable for years.
Frequently Asked Questions
What are Custom Patches and why are embroidered patches popular for branding and personal style?
Custom Patches are fabric patches with embroidered or woven designs that you can attach to clothing, bags, or uniforms. Embroidered patches offer durability, texture, and vibrant color, making them ideal for brand identity, teams, clubs, or personal expression. Exploring patch design ideas can help tailor a look that fits your garment and budget.
How can I develop patch design ideas for Custom Patches that stay legible at small sizes?
Start with the patch’s purpose and audience, then aim for simple shapes, high contrast, and a limited color palette. Consider common motifs like logos, mascots, or mottos and test readability on fabric from a short distance. These patch design ideas are especially important when working with embroidered patches.
What is the patch production process for Custom Patches from artwork to final finish?
The patch production process usually includes artwork prep, digitizing, stitch planning, sample patch review, full production, and finishing. Digitizing converts art into stitch-by-stitch instructions for embroidery, while the sample helps verify color, edge quality, and durability before larger runs for embroidered patches.
Should I DIY patches or use professional production for Custom Patches?
DIY patches offer quick, low-cost options for very small quantities, but may sacrifice consistency and durability compared with professional production. For larger orders, color accuracy, stitch density, and reliable backings are best achieved through a reputable patch manufacturer. Choose based on quantity, timeline, and desired finish for embroidered patches.
What backing and finishing options should I consider for Custom Patches?
Backings range from iron-on and sew-on to Velcro, each with pros and cons for Custom Patches. Finishes include Merrow borders for a classic edge or laser-cut edges for a modern look, with the backing and finish chosen to suit how you’ll apply and wear embroidered patches.
How can I care for and display Custom Patches to maximize longevity?
Care guidelines for patches suggest cold washing, avoiding high heat, and air-drying to protect embroidered patches and their backing. For Velcro-backed patches, keep hooks clean; store patches away from sun to prevent fading. Proper care helps preserve color, stitch integrity, and edge finishing for Custom Patches.
| Section | Key Points | Notes |
|---|---|---|
| Introduction | Patches have evolved from niche embroidery into personal expression, brand identity, and community storytelling; they can decorate denim jackets, backpacks, caps, and club uniforms; this guide covers what patches are, how to design them, how they’re produced, and how to wear them; it covers both DIY and professional paths. | Overview of patch concept and guide scope. |
| What are Custom Patches | Patches are pieces of fabric with embroidery or woven designs that attach to cloth items; they offer tactile texture, vibrant thread colors, and storytelling; they come in various shapes and finishes; backings include iron-on, sew-on, Velcro; examples include embroidered, woven, iron-on, sew-on, and Velcro-backed options. | Backings and finishes vary by type; shapes include round, shield, rectangular, and custom silhouettes. |
| Design Considerations | Determine the patch purpose and audience; wearer and garment type influence size, color, and finish; balance legibility with detail; ensure the design translates well from screen to embroidery. | Contrast, color harmony, and readability at short distances; avoid overly intricate details on small patches. |
| Designing Your Patch: From Idea to Icon | Start with a concept sketch; define size and shape (2–4 inches typical); choose color palette with limited thread colors; decide on finishing (Merrow borders vs laser-cut); select backing options; pay attention to typography; generate patch design ideas; digitize artwork for embroidery. | Digitizing translates artwork into stitch instructions; stitch types, density, and underlay chosen by the digitizer; DIY-friendly machines exist but professional digitizing yields sharper results. |
| Materials, Backing, and Finishes | Patch base fabrics are typically twill or felt; common finishes include Merrow borders and laser-cut edges; backings include iron-on, sew-on, and Velcro; adhesive options exist for temporary wear. | Backings affect durability and laundering; choose accordingly. |
| The Production Process | Workflow includes concept validation, artwork prep, digitizing, stitch planning, sample creation, full production, quality checks, finishing and packaging. | Final product quality depends on color accuracy, edge finish, and backing performance; timelines and costs vary with quantity. |
| DIY Patches vs. Professional Production | DIY patches offer flexibility, faster turnaround, and lower per-unit costs at small quantities but require an embroidery setup and space; DIY paths include iron-on and sew-on patches and patch-making kits. | Professional production provides consistency, higher stitch counts, durable backing options, and scalable quantities; ideal for branding, events, or teams. |
| Care, Display, and Longevity | Care guides suggest hand washing or gentle cold machine washing; turn patches inside out; air-dry; avoid heat; regularly clean Velcro hooks and loops to maintain attachment. | Proper care helps preserve color, stitch integrity, and edge finishing. |
| Patch Design Ideas for Inspiration | Brand identity patches, event patches, hobby and club patches, pop culture and art patches, travel and memory patches. | Design ideas should read well at small sizes and convey the intended story. |
| Putting It All Together: Quick Checklist | Define purpose and wearer; choose size, shape, and finishing; select a limited color palette; decide backing; digitize artwork with appropriate stitch counts; produce a sample; plan care and display; decide between DIY and professional production based on quantity, budget, and timeline. | A practical, end-to-end checklist to implement a patch project. |
| Conclusion | Custom Patches consolidate identity, community pride, and customized apparel into durable, wearable art. | A final recap linking design, materials, production, and care. |
Summary
Custom Patches bring ideas to life by combining art, craft, and storytelling into durable accessories. By understanding design, materials, and production options, you can move from concept to a finished patch that lasts. Whether you DIY patches at home or work with a professional producer for larger runs, thoughtful design, precise stitching, and quality finishing make patches stand out and be worn with pride.
